
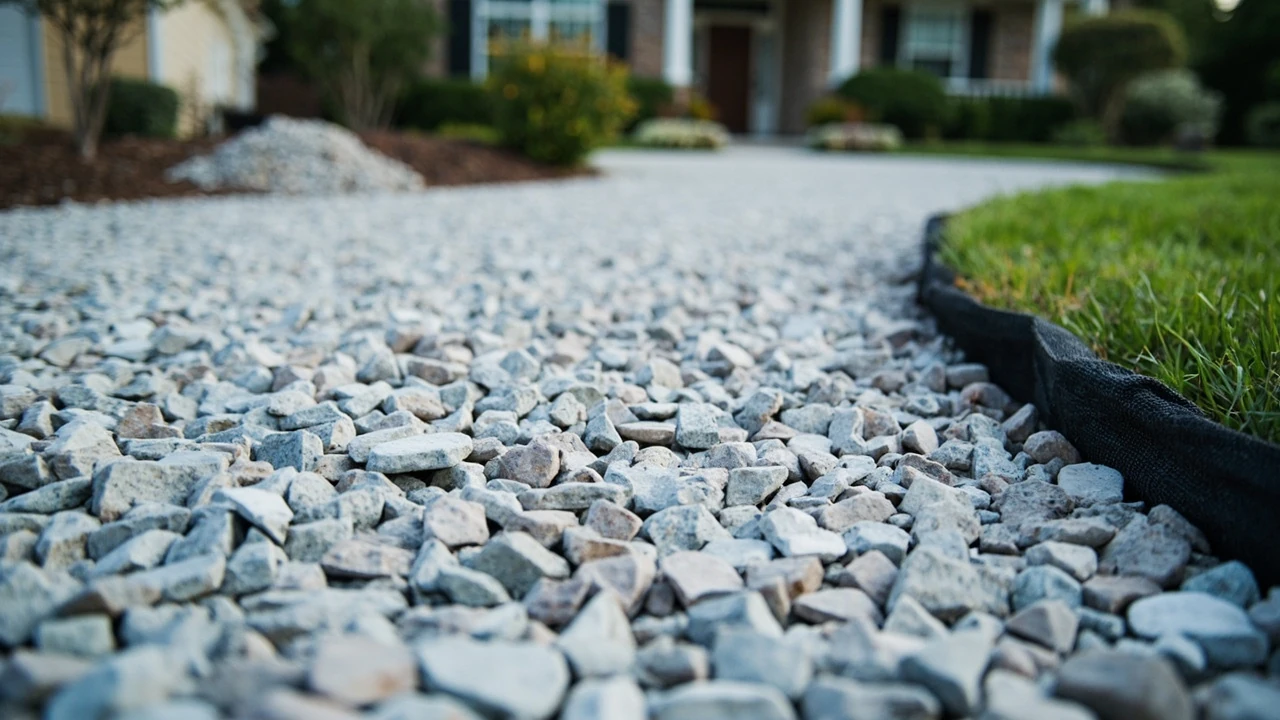
Driveway gravel: a practical guide for U.S. homeowners
A long, rutted tire path filled with muddy water after every rain is the moment most homeowners start searching for driveway gravel. The problem is rarely that gravel is the wrong choice. It is usually that the wrong size, the wrong shape, or the wrong base layer was used, and the surface was never set up to drain or to hold its line under vehicle weight. Picking the right stone, building the base correctly, and keeping up with a small amount of routine maintenance is what separates a gravel driveway that looks good for one season from one that performs for a decade.
This guide walks through how to think about a gravel driveway project from the first phone call to a supplier all the way through seasonal upkeep. It covers how stone shape and size actually affect performance, what a proper base and top layer look like, how to estimate how much material you need, what a realistic budget looks like, and which maintenance tasks are worth doing on a schedule. The goal is to help you make decisions that match the soil, the slope, and the traffic on your specific property rather than copying a generic installation.
What counts as driveway gravel
When suppliers talk about driveway gravel, they generally mean crushed rock in the roughly 3/4-inch range, sometimes layered over a larger base stone. The term covers more than one product, and the differences matter. Limestone, granite, trap rock, hard rock mixes, and recycled crushed concrete are all sold under the same broad label, even though they behave differently under traffic and weather.
A few shared characteristics define a good surface stone. It is angular rather than rounded, so the pieces lock together when a tire rolls over them. It is durable enough to resist breaking down into dust under rain and sun. It is the right size for the layer it sits in, with larger stones forming a stable base and smaller, clean stones forming a comfortable driving surface. Decorative products like marble chips can look attractive, but they are usually a finishing touch rather than a structural layer.
It is also worth separating three terms that homeowners often mix up. “Driveway gravel” usually means crushed angular stone for the top driving surface. “Driveway rock” or “driveway stone” is a broader label that can include the base layer. “Crushed gravel” specifically refers to material that has been mechanically broken, which is the angular product you want for a stable surface, rather than smooth pea gravel that tends to shift under tires.
Why angular stone is the right default
Shape is the single biggest factor in how a gravel surface holds up. Angular crushed stone has sharp edges that interlock when compressed by vehicle weight, which keeps the surface from migrating into ruts. Rounded stone, like pea gravel or river rock, rolls and slides. It feels softer underfoot, which is why it is popular for paths and garden beds, but on a driveway it tends to kick out, expose the base fabric, and form troughs where the tires run.
For most residential driveways, the standard recommendation is a 3/4-inch angular crushed stone such as #57 limestone or granite. The size is large enough to lock together, small enough to walk and drive on comfortably, and easy to grade with a box blade or a landscape rake. The same supplier often sells a larger 1 to 1.5-inch stone for the base layer, and a finer screenings product for the very top, depending on the look you want.
Common types of driveway gravel and where each one fits
Different stone types bring different colors, hardness, and costs. The table below summarizes the most common options and the role each one usually plays in a driveway build.
| Material | Typical role | Color and look | Strengths | Limitations |
|---|---|---|---|---|
| #57 crushed limestone (3/4″) | Top surface layer | Light gray to tan | Angular, locks well, widely available, affordable | Can produce dust in dry weather if not topped periodically |
| #57 crushed granite (3/4″) | Top surface layer | Gray, blue-gray, or mixed tones | Very hard, resists breakdown, locks well | Slightly higher cost than limestone in many regions |
| Trap rock | Base or top layer | Dark gray to charcoal | Extremely hard, stable foundation, modern look | Heavier per ton, fewer local suppliers in some areas |
| Hard rock mix | Top surface layer | Variable gray tones | Durable blend, often more affordable than single-source granite | Color varies between loads, less uniform appearance |
| Recycled crushed concrete (#57 recycled) | Base or budget top layer | Light gray with occasional exposed aggregate | Lower cost, reuses material, angular and stable | Can include fines that dust in dry weather; quality varies by source |
| Marble chips | Decorative top dressing | Off-white to light gray | Bright, reflective, attractive finish | More expensive, can discolor under leaves and oil; not a structural layer |
| Crusher run or 21A base | Base layer only | Gray, dusty | Compacts into a dense, stable foundation | Not a comfortable driving surface; should be capped |
| Pea gravel (rounded) | Limited use, edging accents | Many colors | Soft, attractive, easy to handle | Shifts under tires, not recommended as a main driving surface |
A practical rule of thumb is to use a larger, rougher base stone (often called crusher run, 21A, or traffic bond depending on the region) for the structural foundation, and a clean 3/4-inch angular stone as the top driving layer. Decorative stones are optional finishes on top of that, and rounded stone is best kept to borders and accents where it will not be driven on daily.
How a properly built gravel driveway is layered
A gravel driveway is a small piece of road building, and a road has a job to do: spread the weight of a vehicle over the native soil and shed water quickly. The way a driveway is layered is what determines whether it accomplishes that or slowly turns into a muddy mess. A typical build, from the ground up, looks like this.
- Subgrade. The native soil, stripped of topsoil and organic matter, shaped to a slight crown so water runs off to the sides rather than pooling in the middle.
- Geotextile fabric. A woven or non-woven landscape fabric laid over the subgrade to keep the base stone from migrating into the clay or silt below.
- Base layer. Four to six inches of larger crushed stone, typically 1.5 to 3 inches in size, or a compacted crusher run, spread and compacted in lifts.
- Middle layer (optional). A transition layer of intermediate crushed stone that helps bridge the gap between the large base and the smaller top.
- Top layer. Three to four inches of 3/4-inch angular stone, such as #57, which is the actual driving surface.
- Edging. A restraint along the sides, made of metal, plastic, timbers, or boulders, that keeps the stone from spreading outward under tire loads.
The thickness of each layer depends on the soil and the traffic. A driveway that sees only a passenger car on a well-drained sandy subgrade can sometimes get away with less total depth. A long driveway used daily by heavier vehicles, or one laid over soft clay, needs a deeper base and more attention to drainage. Skimping on the base is the most common reason gravel driveways fail early.
Sizing stone to the job
Stone size is not just a stylistic choice. It is closely tied to the function of each layer. A layer that is too fine will mix with the soil below and pump mud to the surface. A layer that is too coarse will feel harsh to walk on and will shed the top dressing before it has a chance to settle.
| Layer | Recommended size | Why this size works |
|---|---|---|
| Subgrade separation | Geotextile fabric | Keeps fines from migrating up into the base |
| Base stone | 1.5″ to 3″ crushed, or 3/4″ crusher run | Large enough to bridge soft spots, locks under compaction |
| Middle transition | 1″ to 1.5″ crushed | Step between base and top, prevents layers from separating |
| Top surface | 3/4″ (#57) crushed | Locks under tires, comfortable to walk and drive on, drains well |
| Finish dressing | 3/8″ screenings or decorative chip | Fills voids in the top layer, improves appearance |
If you can only afford one layer of stone, make it a 3/4-inch angular product over a properly prepared and crowned subgrade. A single-layer driveway will not last as long as a built-up one, but it is far better than a thin layer of decorative gravel laid directly on soil.
Estimating how much driveway gravel you need
Ordering material is one of the most error-prone parts of a gravel project. Order too little and you pay a second delivery fee on a small load. Order too much and you have a pile of leftover stone blocking the yard. The basic math is straightforward: volume in cubic feet, converted to cubic yards, then to tons using the stone’s density.
For a rectangular driveway, the formula is length × width × depth, in feet, divided by 27 to get cubic yards. A typical single-car lane is about 10 feet wide, a two-car drive around 16 to 20 feet. For a 50-foot single-car drive at 4 inches deep, the math is 50 × 10 × 0.33 = 165 cubic feet, or roughly 6 cubic yards of top stone, plus a similar amount for the base. The table below shows some quick reference numbers for a 10-foot-wide lane.
| Driveway length | Surface stone (4″ depth, cubic yards) | Base stone (4″ depth, cubic yards) | Approx. total weight (tons) |
|---|---|---|---|
| 25 ft | 3.1 | 3.1 | 7 to 8 |
| 50 ft | 6.2 | 6.2 | 14 to 16 |
| 100 ft | 12.3 | 12.3 | 28 to 32 |
| 200 ft | 24.7 | 24.7 | 56 to 64 |
Stone weight varies by material. Crushed limestone and granite typically weigh around 1.3 to 1.5 tons per cubic yard. Trap rock is heavier, often 1.5 to 1.7 tons per cubic yard. Recycled concrete is variable. Always ask the supplier for the specific weight of the product you are buying so your estimate is not off by 10 or 20 percent. Most suppliers also offer an online calculator that handles the math for you once you enter the dimensions.
What a realistic driveway gravel budget looks like
Costs vary widely by region, but the structure of a budget is similar everywhere. Material is the largest line item, followed by delivery, then either equipment rental or contractor labor. Geographic location is the single biggest driver of price, because stone is heavy and shipping it 100 miles changes the per-ton cost meaningfully.
For a rough planning range, residential homeowners in many parts of the U.S. see crushed stone priced somewhere between the high $20s and the low $60s per ton before delivery, with decorative products and specialty stones higher. Delivery fees often add a flat $50 to $150 per load on top of that, depending on distance. A small pickup-truck load is more expensive per ton than a full triaxle, so consolidating into a single large delivery is almost always cheaper if you have room to stage the pile.
For a 50-foot two-car driveway with both base and top layers, a do-it-yourself install using rented equipment often lands in the $1,500 to $3,000 range for materials and rental. A professionally installed driveway of similar size frequently runs from $3,000 to $6,000 or more, depending on site prep needs. Steep grades, poor subgrade soils, long driveways, and the need for culverts or significant drainage work push costs higher. Recycling crushed concrete can lower material costs noticeably, and is one of the more affordable ways to put a structural layer down on a budget.
Site preparation that makes the difference
Most of the long-term performance of a gravel driveway is decided before any stone is delivered. The first step is to strip topsoil and organic material from the driveway path, because organic matter decomposes and leaves voids. The next is to shape the subgrade with a crown of about 1 to 2 inches across the width of the drive so water runs off to the sides instead of down the center of the tire path.
If the native soil is heavy clay, it is worth considering additional drainage work before the stone goes down. A simple French drain along one side, or a small culvert where the drive crosses a low spot, can prevent the kind of water damage that slowly undermines even a well-built gravel surface. Laying geotextile fabric at this stage is one of the most cost-effective upgrades a homeowner can make, because it keeps the base stone from sinking into the subgrade over time.
For a do-it-yourself project, the minimum equipment is a compact tractor or skid steer with a box blade for grading, plus a hand tamper or plate compactor for the base. A landscape rake and a heavy drag mat are useful for finishing the top layer. Without compaction, a base layer will settle unevenly under traffic and the surface will develop low spots within the first season.
Step-by-step installation for a new driveway gravel surface
For homeowners planning a new build, the order of operations is fairly consistent regardless of the length of the drive. The steps below assume a typical residential driveway with a structural base and a 3/4-inch top layer.
- Mark and strip the path. Define the edges with stakes and string, then remove topsoil to a depth of 8 to 12 inches along the centerline.
- Shape the subgrade. Build a crown of about 1 to 2 inches from the center to each side, and address any obvious drainage issues such as low pockets that hold water.
- Lay geotextile fabric. Roll it out along the full length, overlapping seams by at least 12 inches and pulling it up the sides a few inches above the finished surface.
- Install edging. Set metal, plastic, or timber edging along both sides to keep the top layer from spreading.
- Spread and compact the base. Add 4 to 6 inches of larger crushed stone or crusher run, compact it in 2-inch lifts, and recheck the crown.
- Add the middle layer if used. Spread 2 inches of intermediate stone, lightly compact, and smooth transitions.
- Spread the top layer. Add 3 to 4 inches of 3/4-inch angular stone, rake it smooth, and compact lightly so the pieces lock but do not crush.
- Finish the edges. Rake the edges tidy and pull fabric up over the edging if appropriate.
- Water and rest. A light watering helps fines settle into the top layer; avoid driving on the new surface for a day or two if possible.
The first heavy rain on a new driveway is a useful test. If water runs off cleanly to the sides and the surface stays firm under tires, the build is working. If water sits in the center or the surface turns slick, the crown or the drainage plan needs another pass before any decorative top dressing is added.
Common mistakes that shorten the life of a gravel driveway
Most gravel driveways do not fail because the stone was bad. They fail because of decisions made during the build or because maintenance was ignored. The following issues come up again and again, and each one is fixable or avoidable.
- No geotextile fabric. Without a separation layer, the base stone slowly sinks into soft subgrade and the surface develops ruts.
- Flat or dished subgrade. A driveway that is level across or, worse, dished in the middle, holds water and turns to mud under traffic.
- Rounded stone on a driving surface. Pea gravel and river rock shift under tires, expose the base fabric, and require frequent regrading.
- Top layer too thin. Less than 3 inches of top stone disappears quickly under regular use, especially on a busy drive.
- No edging. Without restraint, the top layer spreads outward over time, narrowing the usable drive and thinning the surface.
- Skipping compaction. A loose base settles unevenly as soon as vehicles start using the drive.
- Ignoring drainage. A culvert that is too small, a ditch that has silted in, or a low spot near a garage will undermine even a well-built surface.
None of these are expensive to address during the build, but each one becomes a recurring maintenance problem if it is left in place after the stone has gone down. A modest amount of extra effort up front, especially with fabric, crown, and edging, saves many hours of work later.
Maintaining a gravel driveway through the seasons
Ongoing maintenance on a gravel driveway is not complicated, but it is also not optional. The most useful tasks are grading, weed control, and replenishing the top layer as it slowly works its way into the base or migrates off the edges. Doing a light pass in spring and another in fall keeps most residential drives in good shape year-round.
Grading means redistributing stone to fill ruts and restore the crown. For a long drive, a box blade on a compact tractor is the most efficient tool. For shorter driveways, a landscape rake and a heavy drag mat can do the same job more slowly. The goal is not to move stone far, but to push the loose material from the edges back into the center and re-establish a gentle crown.
Weed control is mostly about the right base, not the right herbicide. A proper fabric-and-stone build lets very little light through, and most weeds never get started. Where they do show up, hand pulling or a targeted treatment along the edges is enough. Broad chemical spraying across the surface tends to kill the grass that helps hold the shoulders in place, which can cause its own erosion problems.
Replenishing stone every few years is normal. A driveway that loses half an inch of top material per year from snow plowing, traffic, and rain needs about 5 to 10 percent of its original top layer added back over that period. A small load of fresh 3/4-inch stone every two to three years is usually enough to keep the surface at its original depth.
Winter care for a gravel driveway
Snow management is one of the more challenging parts of owning a gravel drive, because plows can scrape the surface and pull stone off the edges. A few habits make a real difference over the life of the driveway. Setting the plow blade about an inch above the surface on a first pass, using a rubber edge on the plow, or using a snow blower on the first two inches of accumulation all reduce stone loss. Plowing early and often, before the snow compacts, also helps because compacted snow is harder to remove without scraping.
Salt and de-icers behave differently on gravel than on paved surfaces. Standard rock salt is generally safe, though it can wash fines into the ditches over time. Calcium chloride is more aggressive and can affect nearby plants if it drains into lawn areas. Sand is a useful alternative in very cold conditions because it adds traction without affecting the stone, but it does need to be cleaned out in spring so it does not clog the top layer.
Edging, borders, and visual upgrades
Edging is not just a structural element. It is also the easiest way to make a gravel driveway look deliberate rather than temporary. Steel edging, when set flush with the surface, gives a clean line that holds up to plowing. Timber edging looks warmer but degrades faster and can trap moisture. Boulder edges are popular on rural properties and provide a strong visual border, though they make grading more careful work.
Within the drive itself, visual upgrades are usually a question of top dressing. A thin layer of 3/8-inch stone or a decorative chip over a stable 3/4-inch base gives a uniform color, hides footprints, and reduces dust. Some homeowners add a contrasting strip of darker stone along the center as a decorative detail. The structural driveway is still doing the work, but the eye sees a finished surface.
When a gravel driveway is not the right answer
Gravel is a good fit for most low-traffic residential drives, but it is not a universal solution. A few situations call for a different approach or for extra work alongside the gravel.
- Very steep grades. Slopes above about 12 to 15 percent tend to shed stone downhill in heavy rain. They can be built, but they need more aggressive drainage, deeper base, and often a crowned or terraced cross section.
- Heavy truck traffic. Daily delivery trucks or large work vehicles will rut a standard residential build. A deeper base, larger top stone, and frequent regrading are usually required.
- Poorly drained sites. Boggy subgrade, high water tables, or springs crossing the drive will undermine a gravel surface without significant drainage work first.
- Strict HOA requirements. Some neighborhoods limit loose surface materials or require specific driveway finishes. Gravel can usually be made to comply, but it is worth checking before the first load is delivered.
In those cases, the answer is usually more preparation, not a switch to asphalt. A properly engineered gravel driveway on a difficult site can outperform a thin asphalt pad. The difference is in the time and money spent on subgrade, drainage, and base depth.
Sourcing driveway gravel in your area
Most homeowners buy from a local quarry, a landscape supply yard, or a bulk material dealer. Quarries typically offer the widest range of stone types and the most consistent quality, but they may have a minimum order and limited delivery windows. Landscape supply yards tend to be more flexible on smaller loads and often carry decorative products alongside structural stone. Bagged stone from a building supply store is convenient for very small touch-up jobs, but it is significantly more expensive per ton than bulk delivery.
When talking to a supplier, it helps to be specific. Use the term “3/4-inch #57 crushed” for the top layer, and ask for the same product the supplier recommends for the base. Ask for the weight per cubic yard so you can convert your volume estimate into tons, and ask about delivery lead times, which can stretch out in spring when demand peaks. A reputable supplier will not push you toward decorative stone as a structural layer, and will tell you when the subgrade needs more work than a stone delivery will solve.
For a deeper look at how suppliers describe their own products and what they recommend for residential driveways, the Driveway Gravel product category at Gravelshop is a useful reference point for comparing stone types, sizes, and intended uses. It is also worth cross-referencing any local recommendation against a general overview of how crushed stone has been used in road and driveway construction, which the English Wikipedia entry on gravel covers in some depth, including the difference between crushed and natural gravel and the role each plays in surface construction.
How driveway gravel compares to other surfaces
The decision between gravel and a paved surface is mostly about budget, maintenance tolerance, and site conditions rather than which option is objectively better. A few practical comparisons come up in almost every conversation with a homeowner.
| Factor | Gravel driveway | Asphalt driveway | Concrete driveway |
|---|---|---|---|
| Upfront cost (residential) | Low to moderate | Moderate to high | High |
| Maintenance effort | Periodic grading and topping | Sealcoating, crack repair | Occasional sealing, crack monitoring |
| Drainage | Excellent when crowned | Requires slope and drains | Requires slope and drains |
| Snow plowing | Needs care to avoid stone loss | Straightforward | Straightforward |
| Lifespan before major work | Indefinite with top-ups | 15 to 25 years | 25 to 40 years |
| Repairability | Add more stone | Patching, resurfacing | Slab replacement |
Gravel wins on upfront cost, drainage, and ease of repair. Asphalt and concrete win on convenience and on a more uniform surface. For long driveways on rural land, gravel is often the only financially realistic option, and it can be maintained to look clean and intentional rather than temporary.
Frequently asked questions
What is the best gravel to use for a driveway?
For most residential driveways, the best choice is a 3/4-inch angular crushed stone such as #57 limestone or #57 granite. The angular pieces lock together under tire weight, drain well, and are widely available. A larger base stone below that layer, often 1.5 to 3 inches in size, gives the driveway its structural strength.
How deep should driveway gravel be?
For a typical passenger-car driveway on reasonably stable soil, plan for about 4 inches of base stone and 3 to 4 inches of top stone, for a total of 7 to 8 inches of compacted gravel. Soft clay subgrade, steep grades, or heavy vehicles push the recommendation toward a deeper base, often 8 to 12 inches total.
How do you keep gravel in place on a driveway?
Three things make the biggest difference: an angular crushed top stone rather than rounded gravel, edge restraints along both sides to keep the surface from spreading, and a properly crowned subgrade so the surface does not hold water. Geotextile fabric under the base also reduces stone loss into the subgrade over time.
How much does a ton of driveway gravel cover?
One ton of crushed stone at 3/4 inch typically covers about 90 to 100 square feet at 2 inches deep, or about 60 to 70 square feet at 3 inches deep. Density varies by material, so ask the supplier for the specific weight per cubic yard of the product you are buying before ordering.
Can you put driveway gravel directly on dirt?
It is possible, but the result will not last. Stone laid directly on dirt migrates into the subgrade, the surface develops ruts, and weeds come through quickly. Laying geotextile fabric and a compacted base layer over the prepared subgrade makes a meaningful difference in how long the surface stays usable.
Do gravel driveways need a permit?
In most U.S. jurisdictions, replacing an existing gravel driveway in the same footprint does not require a permit, but installing a new driveway, adding a culvert, or changing the drainage pattern can. Local rules vary, so it is worth checking with the county or municipality before starting a new build or any work that affects a roadside ditch or culvert.
How often should you add more gravel to a driveway?
For a typical residential driveway, plan to add a thin layer of fresh top stone every two to four years. Driveways that get heavy plowing, see frequent heavy vehicles, or are on a noticeable slope tend to need topping more often. Spring is usually the best time to inspect and top up.
What size gravel is best for drainage under a driveway?
For drainage under or beside a driveway, a 1.5 to 3 inch washed crushed stone is a common choice, sometimes wrapped in a perforated pipe and fabric to form a French drain. The larger size keeps the void space open so water can move, while the fabric prevents fines from clogging the stone.
Is crushed concrete a good option for a driveway?
Recycled crushed concrete can be a budget-friendly structural layer, especially as a base under a cleaner top stone. Quality varies by source, and some loads include more fines, which can dust in dry weather. Used as a base, it performs well. Used as a top layer, it is less consistent in appearance than virgin crushed stone.
How do you keep weeds from growing in driveway gravel?
A proper fabric-and-stone build is the most effective long-term prevention, because it blocks the light most weeds need to establish. Where weeds do appear along the edges, hand pulling or a targeted spot treatment works better than broadcast spraying, which can also kill the grass that holds the driveway shoulders in place.
Putting it into practice on your property
The right gravel driveway starts with a clear read of the site: the soil, the slope, the traffic, and the budget. Match the stone to the job, build the base properly, crown the subgrade, and add restraint at the edges, and the rest of the work is small and infrequent. A short grading pass each spring, a fresh load of top stone every few years, and a careful eye on drainage will keep the surface usable for a long time. The decisions that matter most are the ones made before the first load of stone is delivered, because they determine whether the driveway becomes a low-effort part of the property or a recurring weekend project.
Leave a Reply