
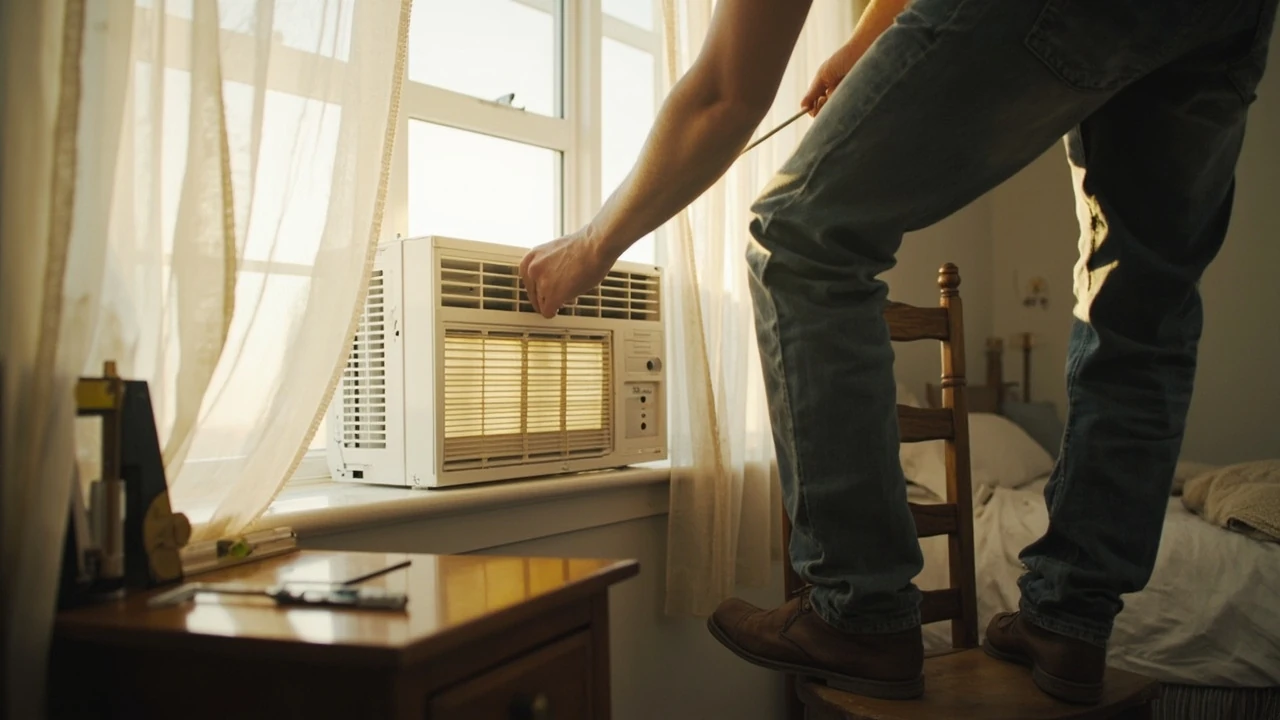
Window AC repair: what homeowners should know before calling a technician
A window air conditioner that suddenly starts blowing warm air, dripping water onto the sill, or rattling like a bag of loose bolts is rarely beyond saving. Most window units can be revived with a careful diagnosis, a thorough cleaning, and one or two replacement parts. The trick is knowing which problems are safe to handle at the kitchen table, which ones need a licensed technician, and which ones signal that the unit has reached the end of its useful life.
This guide walks through the decisions a typical U.S. homeowner faces when a window AC stops working the way it should. It covers the most common failure modes, the practical checks you can do yourself, the realistic costs of a professional window AC repair, and the signs that replacement is the smarter move. The aim is to help you spend the right amount of money, not the maximum amount, to get a comfortable room back.
Why window units fail more often than central air
Window air conditioners live a hard life. They sit in a hole in the wall, exposed to summer heat, rain, insects, and dust, while vibrating against a wood or metal frame every time the compressor cycles. Unlike a split system or a central air handler, a window unit has no service access panel, no isolated indoor and outdoor sides, and almost no buffer between the moving parts and the room you sleep in.
That combination of stress and exposure explains why a window unit that ran fine last August can wheeze, click, or simply quit on the first hot night of the new season. The good news is that most of those failures are caused by a small number of well-understood problems, and most of those problems are fixable without buying a new appliance.
The most common window AC problems
Before scheduling a service call, it helps to understand which symptoms usually point to which causes. The table below maps the symptoms homeowners describe to the most likely underlying problems and the general difficulty of fixing each one.
| Symptom | Most likely cause | Typical difficulty | DIY or pro? |
|---|---|---|---|
| Blowing warm or room-temperature air | Dirty evaporator coil, low refrigerant, failed capacitor, or iced-up coil | Low to moderate | Often DIY after cleaning; capacitor and refrigerant need a pro |
| Water dripping inside the room | Unit not tilted outward, clogged condensate drain, or a cracked drain pan | Low to moderate | Usually DIY once the cause is found |
| Clicking but not starting | Failed start or run capacitor, weak compressor, or low voltage supply | Moderate | Capacitor is a pro job; compressor usually means replacement |
| Loud buzzing or humming | Debris in the fan, failing motor bearings, or a stuck relay | Low to high | Debris is DIY; motor and relay need a pro |
| Bad smell on startup | Mold or mildew on the evaporator coil and blower wheel | Low | DIY with coil cleaner and a new filter |
| Unit cycles on and off rapidly | Oversized unit, dirty coil, failing thermostat sensor, or restricted airflow | Low to moderate | Clean first; sensor and sizing are pro-level |
| Ice forming on the back of the unit | Restricted airflow, low refrigerant, or running the unit in cold weather | Low to moderate | Thaw, clean, and retest; refrigerant needs a pro |
| No power at all | Tripped breaker, bad outlet, failed power cord, or a blown control board | Low to high | Outlet and breaker are DIY; board and cord are pro-level |
Safe checks you can do before scheduling a repair
Many window AC service calls begin with problems that the homeowner could have solved in an afternoon. Before reaching for the phone, work through this short list in order. Each step is safe for someone who is comfortable on a step stool and willing to unplug the unit first.
- Confirm power at the outlet using a lamp or phone charger, and reset the breaker if it has tripped.
- Remove and wash the air filter with warm water and a drop of dish soap, then let it dry completely.
- Pull the unit forward carefully and vacuum the front grille and the visible coils with a soft brush attachment.
- Check that the unit is tilted slightly, about a quarter inch, toward the outside so condensate drains out instead of into the room.
- Look for ice on the back of the unit, and if you find any, turn the unit off, leave the fan running, and give it several hours to thaw before testing again.
If those steps restore cooling, the unit was simply suffering from restricted airflow, which is the single most common cause of poor performance. If cooling does not return, the problem is almost certainly electrical or refrigerant-related, and that is the point at which a service call usually pays for itself.
Tools and supplies a homeowner can keep on hand
You do not need a full HVAC toolkit to maintain a window unit. A small, well-chosen kit covers the routine work and saves a trip to the hardware store every time the filter needs attention. The list below is enough for filter changes, coil cleaning, basic disassembly, and reseating the unit in the frame.
- A soft-bristle vacuum brush for the evaporator and condenser coils.
- No-rinse coil cleaner rated for window AC units, or a mild solution of dish soap and water for light dirt.
- A putty knife and a stiff plastic scraper for removing gasketed foam that has dried out.
- A 25-foot outdoor extension cord rated for the unit’s amperage, used only for testing, not as a permanent power solution.
- A simple plug-in outlet tester to confirm the window outlet is wired correctly and grounded.
- Replacement foam weatherstripping and a roll of aluminum tape to reseal the sides after reinstalling the unit.
- A small level and a folding ruler to confirm the unit is tilted toward the outside.
Keep these items together in a labeled bin so the next seasonal service takes an hour rather than an afternoon.
When window AC repair makes sense
Repair almost always makes sense when the unit is under eight years old, has been reasonably maintained, and the symptom points to a single replaceable part. A failed capacitor, a burned-out fan motor, a clogged condensate system, a stuck contactor, or a worn control board are all good candidates for repair on a unit that is otherwise sound. The labor is usually modest because the unit is small, accessible, and built to be serviced.
Repair also makes sense when the symptom is environmental rather than mechanical. Water in the room, ice on the coil, bad smells, and rattling fans are usually caused by dirt, slope, or a dried-out seal. None of those require a part at all, and a careful homeowner can fix them with a bottle of cleaner and a roll of foam.
When replacement is the better answer
There are situations where putting more money into an old window unit is throwing good money after bad. A unit that is past twelve years old, that has needed multiple repairs in the last two seasons, or that uses a refrigerant that is no longer widely available is usually a better candidate for replacement. The same is true for any unit with a rusted cabinet, a corroded base pan, or a compressor that draws a locked-rotor current when tested by a technician.
Replacement is also worth considering when the original unit is the wrong size for the room. An oversized unit cools the room quickly but never runs long enough to dehumidify, leaving the room cold and clammy. An undersized unit runs constantly, drives up the electric bill, and wears the compressor out early. A trained technician can perform a simple load calculation and recommend a properly sized replacement rather than simply swapping a like-for-like unit.
Repair vs. replacement: a side-by-side view
For additional context, Choosing between repair and replacement usually comes down to a few practical numbers. The table below gives a rough framework that aligns with what most licensed contractors will tell a homeowner after a diagnostic visit. Costs vary by region, brand, and availability of parts, so treat these as decision rules rather than quotes.
| Factor | Repair usually wins | Replacement usually wins |
|---|---|---|
| Unit age | Under 8 years | Over 12 years |
| Symptom | Single replaceable part, dirty coil, slope or seal issue | Seized compressor, rusted cabinet, refrigerant leak in an obsolete system |
| Cost compared to a new unit | Repair is less than half the price of a comparable new unit | Repair is more than half the price of a comparable new unit |
| Energy use | Original unit was reasonably efficient | Original unit was a pre-2010 model with no energy-saving features |
| Frequency of past repairs | First or second repair in the unit’s life | Third repair in two seasons, or a pattern of escalating problems |
| Availability of parts | Standard capacitor, motor, or thermostat parts are in stock | Custom or discontinued parts that must be special ordered |
What a professional window AC repair visit looks like
Knowing what to expect from a service visit makes it easier to judge whether the technician is doing the work you are paying for. A thorough visit usually follows a predictable sequence, even though the exact steps depend on the symptom.
- Verify power, voltage, and grounding at the wall outlet before touching the unit.
- Pull the unit from the frame or open the service panel to access the chassis.
- Inspect the filter, the evaporator coil, the condenser coil, and the condensate path for blockages.
- Test the start and run capacitors, the fan motor windings, and the compressor windings with a multimeter.
- Measure the temperature drop across the evaporator to confirm the system is actually cooling.
- Clean accessible coils and the condensate pan, replace any failed electrical components, and reinstall the unit.
- Confirm correct slope, reseal the sides, and run the unit for at least fifteen minutes to verify the repair.
A technician who skips the electrical tests and simply sprays coil cleaner is probably doing you a favor for a problem you could have fixed yourself. A technician who tests, identifies a specific failed part, and quotes a firm price before doing the replacement is doing the work a service call is meant to cover.
Seasonal maintenance that prevents most repairs
Most window AC repairs are preventable. The problems that drive service calls tend to build up slowly over several seasons, and a short annual routine interrupts that buildup before it becomes a breakdown. A reasonable maintenance routine for a unit that runs through the summer looks like this.
- At the start of the season, wash or replace the filter, vacuum the visible coils, and confirm the unit is tilted slightly toward the outside.
- Mid-season, after about six weeks of heavy use, pull the filter and rinse it again, and listen for any new sounds that were not there before.
- At the end of the season, remove the unit if possible, clean the coils thoroughly, dry the chassis, and store it indoors or cover it with a fitted outdoor cover.
- Inspect the foam seals each spring and replace any foam that has dried, cracked, or pulled away from the frame, since air leaks force the compressor to work harder.
- Keep the area around the unit clear of curtains, bedding, and stored boxes, since blocked return air is the leading cause of icing.
Cost expectations for common window AC repairs
Costs vary by region and by the brand of the unit, but a homeowner can still build a realistic budget by looking at the most common repair categories. The figures below are typical ranges for a standard service call in a U.S. metropolitan area, and they assume the unit is accessible, installed in a standard window, and not on a high floor that requires a lift.
- Diagnostic visit and basic cleaning: often a flat trip charge that can be credited toward the repair if you proceed.
- Capacitor replacement: one of the most common electrical fixes, with the part usually well under the labor cost.
- Fan motor replacement: moderate cost because the motor itself is more expensive than a capacitor and the access is similar.
- Coil cleaning and condensate service: relatively inexpensive because the labor is the main component and no parts are required.
- Refrigerant top-off on a serviceable unit: a moderate cost, and one a technician will usually decline on a sealed system because the leak will simply return.
- Full unit replacement and professional installation: higher up front, but includes proper sizing, mounting, and a fresh warranty.
Safety notes for any DIY window AC work
Window air conditioners mix water, high-voltage electricity, and sharp metal edges, and any of those can ruin a Saturday. A few habits keep that risk low without turning a maintenance task into a major project.
- Always unplug the unit before removing the front grille or the case, even for a filter change.
- Never work on the unit while it is sitting in the window, since leaning into the chassis can shift its weight and pull it toward you.
- Have a second person steady the unit whenever you slide it out of the frame, because even a 40-pound window AC can drop onto a hand or a foot.
- Do not pierce the copper refrigerant lines, since releasing refrigerant into a closed room is a serious health hazard and a violation of environmental rules.
- Do not bypass safety switches or jump capacitors, since those parts exist to protect the compressor and the wiring from damage.
How the room, the window, and the unit interact
Window AC problems are not always problems with the appliance. The room itself can make a perfectly good unit look like a failure, and a quick look around the space often explains a complaint that a service call would only confirm. Direct sun on the wall behind the unit, a window that faces west with no shade, an open doorway to a hot hallway, and a return grille that is blocked by furniture all force the unit to work harder than it was designed to.
Simple room changes can extend the life of an aging unit. Drawing the blinds on the sunny side of the room during the hottest part of the day, adding a weatherstrip on the door to the rest of the house, and keeping the area in front of the unit clear can each drop the run time by a noticeable margin. None of those changes cost much, and together they often solve the complaint that prompted a service call in the first place.
Choosing a technician for window AC repair
Not every HVAC company treats a window unit the same way a split system is treated, and a few practical questions help separate a good fit from a poor one. A short conversation before the visit is worth the time because it sets expectations and avoids a bill for a problem the technician was never really equipped to fix.
- Ask whether the company services window units at all, since some contractors only work on central and ducted systems.
- Ask about a flat diagnostic fee that is credited toward the repair if you proceed, which is a common and fair arrangement.
- Ask whether the technician will test electrical components with a meter or only by visual inspection, since a meter test is the only reliable way to confirm a failed capacitor or motor.
- Ask whether the company stocks common capacitors and fan motors, because a unit left waiting for a special order part often sits in the window for a week.
- Ask for a written estimate that includes the part, the labor, and any trip charge, so there are no surprises at the end of the visit.
The role of the installer in long-term reliability
How a window unit is installed has more effect on its long-term reliability than the brand on the front of the cabinet. A unit that sits level instead of tilted, that is sealed with cracked foam instead of fresh weatherstripping, and that drains onto a flat pan instead of through a clear path to the outside will fail in predictable ways. Many of the symptoms that look like compressor or refrigerant problems are actually installation problems that show up as the unit heats up and the foam dries out.
For a unit that is being reinstalled after a repair, a short checklist of installation details keeps small problems from coming back. A properly installed window AC should sit slightly higher on the inside than on the outside, should be supported by the window sill and a sturdy angle bracket rather than the sash alone, should have fresh foam on both sides, and should be plugged into an outlet that is on a dedicated circuit or at least one that is not shared with a large kitchen appliance.
When a window unit is not the right tool at all
It is worth saying plainly that some cooling problems are not really window AC problems. A room that loses its cool every afternoon because the attic above it is holding 140-degree air will not be fixed by a larger or newer window unit. A west-facing bedroom with single-pane glass and no exterior shade will overheat regardless of the unit on the sill. A multi-room apartment that runs a single window unit in the living room will never feel comfortable in the back bedroom.
For those situations, a window unit is the wrong tool, and the right answer is a combination of air sealing, attic insulation, exterior shading, and possibly a ductless mini-split that can handle the load properly. Recognizing the difference between a failing window unit and a room that is asking for a different solution altogether saves money and frustration.
Putting it all together: a short decision path
Most homeowners end up running through the same short decision path when a window AC starts misbehaving. The list below summarizes the path in a way that takes about ten minutes and works for the vast majority of summer complaints.
- Confirm the outlet has power and the breaker has not tripped, then reset the unit at the control panel.
- Pull and clean the filter, and vacuum the visible coils at the front of the unit.
- Check for ice on the back of the unit, thaw it if present, and retest after several hours.
- Confirm the unit is tilted slightly toward the outside and that the foam seals are intact.
- If the unit still does not cool, schedule a professional diagnostic and ask for a written estimate before any repair work begins.
- Compare that estimate against the cost of a comparable new unit, and use the repair-versus-replacement table to make the call.
That path catches the problems that do not require a technician, and it routes the rest to a service call that is more likely to result in a clean, lasting fix.
Frequently asked questions
How long does a window AC usually last before it needs major repair?
Most window air conditioners run for about 8 to 12 years before the compressor, the cabinet, or a hard-to-source part makes major repair uneconomical. A well-maintained unit in a shaded window can stretch past that range, while a hard-working unit on a sunny wall may need attention sooner.
Is it worth repairing a window AC that is more than ten years old?
It depends on the part. A ten-year-old unit with a failed capacitor or fan motor is usually worth repairing, because the parts are inexpensive and the rest of the unit has years of life left. A ten-year-old unit with a seized compressor or a refrigerant leak in a sealed system is usually a better candidate for replacement, because the compressor and the labor are expensive.
Can I do window AC repair myself without voiding the warranty?
You can handle basic maintenance such as cleaning filters, vacuuming coils, and resealing the foam without affecting the warranty. Electrical work, refrigerant work, and any disassembly beyond the front grille can void the warranty on some brands, so check the owner’s manual or the manufacturer website before going further.
How do I know if my window AC is low on refrigerant?
Low refrigerant is rarely the first cause of poor cooling and almost never shows up on a sealed window unit. The most reliable signs are weak cooling combined with ice on the back of the unit, and both of those usually have a simpler explanation such as a dirty filter, a dirty coil, or a unit that is running in cold weather. A licensed technician can confirm a true refrigerant issue with a meter.
What is the most common part that fails on a window AC?
The most common parts that fail on a window AC are the start and run capacitors, the fan motor, and the rotary switch on the control panel. Capacitors are inexpensive and quick to replace, while motors and control boards are more involved. A failed compressor is less common but more serious, and usually signals the end of the unit’s useful life.
Why does my window AC leak water inside the room?
Window AC units leak inside when the unit is level or tilted toward the room, when the condensate drain is clogged, or when the drain pan has rusted through. The fix is usually straightforward: reset the slope, clear the drain path with a small brush, and replace the pan if it is corroded.
Can a window AC be repaired if the compressor is bad?
In theory yes, in practice almost never. Compressor replacement on a sealed window unit is more expensive than buying a new comparable unit, and the labor often approaches the price of the appliance itself. Most technicians will recommend replacement when the compressor is the confirmed problem.
How often should a window AC be serviced?
A yearly tune-up at the start of the cooling season is a reasonable cadence for most households, with a quick filter cleaning in the middle of the summer if the unit runs daily. A service visit every two to three years is enough for a lightly used unit in a guest room or a home office.
What size window AC do I need for my room?
Sizing is based on the square footage of the room, the ceiling height, the amount of sun the room gets, and how well the room is insulated. A common starting point is roughly 20 BTU per square foot, with adjustments for sun, shade, and heat-producing electronics. A trained technician or a sizing calculator from a manufacturer can give a more accurate number for a specific room.
Is it cheaper to repair a window AC or replace it?
For a unit under eight years old, repair is almost always cheaper. For a unit over twelve years old, or one that has needed several recent repairs, replacement is usually the better long-term value. A good rule of thumb is to compare the quoted repair against half the cost of a comparable new unit, and to replace when the repair crosses that line.
If your window AC has been struggling through the summer and you have already cleaned the filter and reset the slope, the next step is a professional diagnostic from a technician who services window units. A short service visit will confirm whether the problem is a single failed part, an installation issue, or a sign that the unit has reached the end of its useful life, and that answer is the foundation of every other decision you will make about the room. For other home systems that benefit from the same kind of careful, hands-on attention, our guide to plumbing repair follows a similar pattern of diagnosis before spending, and homeowners weighing a window replacement can also learn from the practical framing in what is a skylight.
Leave a Reply