
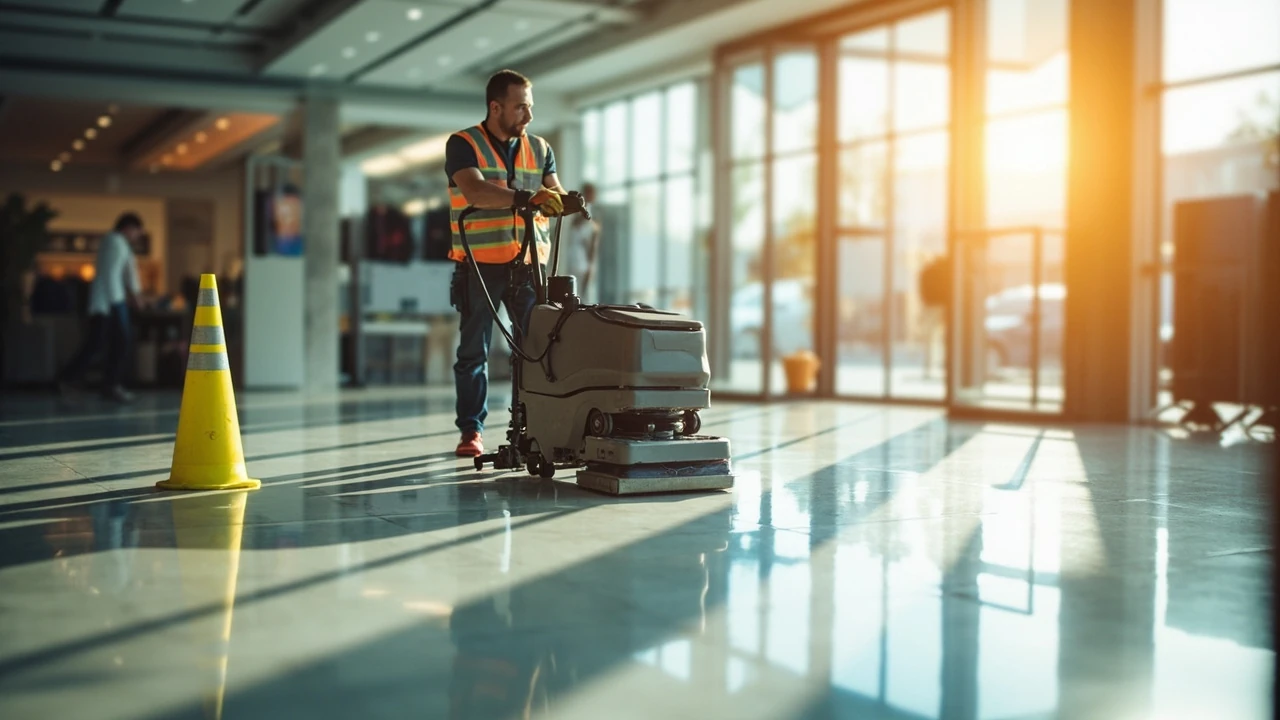
Commercial floor waxing: a practical guide for facility managers
A grocery store manager in Ohio was losing customers because the entryway vinyl looked dull and sticky under every shopping cart. The regional director wanted the floor refinished overnight so the store could open at six. That kind of pressure is exactly why commercial floor waxing is treated as a craft, not a chore: one bad coat, a missed rinse, or a rushed dry time and the floor peels within weeks, turning a routine maintenance job into a budget problem and a safety concern.
Facility managers, property supervisors, and contract cleaners face the same core question every few months: how do you keep a high-traffic floor looking clean, slip-resistant, and professional without burning the budget or shutting the building down for days? The answer is a repeatable process, the right chemistry, and honest expectations about what wax can and cannot do. This guide walks through that process in detail, from choosing a coating system to planning the next maintenance cycle, and it is written for people who actually sign off on the work order, not for chemistry textbooks.
What commercial floor waxing actually means
Waxing, in the maintenance world, covers a wider range of products than the old paste wax used on hardwood. In most commercial settings, the term refers to polymer floor finishes applied as a liquid, then buffed to a gloss. These finishes sit on top of resilient flooring such as vinyl composition tile (VCT), sheet vinyl, linoleum, rubber, and some polished concrete overlays. The goal is not just shine. A properly built finish film protects the floor from scuffs, soil penetration, and chemical attack, and it gives cleaning crews a sacrificial layer they can renew without touching the substrate underneath.
Two terms are often used interchangeably but mean different things. A floor finish is the modern polymer-based coating, usually acrylic or urethane-modified acrylic, that builds up in layers. A floor wax, strictly speaking, refers to older natural or synthetic wax products that are softer and burnish easily. Many facility teams still say “wax” out of habit, but the product in the drum is almost always a polymer finish. Recognizing that distinction matters when you read product data sheets and when you decide whether to use a strip-and-refinish cycle or a scrub-and-recoat cycle.
Why high-traffic floors need a finish at all
Unfinished resilient flooring in a busy building is exposed to three forces at once: abrasive soil underfoot, chemical attack from spills and cleaning products, and UV fading near entryways. The finish film absorbs those forces instead of the floor. When the film wears, you strip it off and lay a fresh film, and the floor underneath is still serviceable. Without that sacrificial layer, the tile itself gets stained, scratched, and yellowed, and the only option is replacement.
For facility managers, this is a lifecycle question. A VCT floor that is well maintained can run fifteen to twenty years. The same floor that is mopped with strong detergent and never sealed may need replacement in seven. The waxing budget is part of the reason for that gap.
The two main coating systems
Most facilities choose between two paths: traditional acrylic finishes that are stripped and reapplied on a schedule, or urethane and polyurethane systems that are applied once and maintained with cleaner and recoat. The table below compares the most common options a facility team will see on a quote.
| System | Typical build | Gloss range | Maintenance pattern | Best fit |
|---|---|---|---|---|
| Acrylic polymer finish | 4-6 coats on VCT or vinyl | Matte to high gloss | Strip and refinish every 12-24 months; daily mop and buff | Retail, schools, offices, healthcare common areas |
| Urethane-modified acrylic | 3-4 base coats plus a urethane topcoat | High gloss, harder film | Longer strip cycle, scrub and recoat between full strips | Supermarkets, hospitals, airports with very heavy traffic |
| Polyurethane roll-on coating | 2 coats directly on prepared substrate | Satin to gloss, very hard | Clean and recoat only; no periodic stripping | Kitchen back-of-house, labs, restrooms with high chemical exposure |
| Seal and finish hybrid | Penetrating sealer topped with 2-3 finish coats | Medium gloss | Standard strip cycle, fewer coats overall | Older VCT that is porous or worn |
The acrylic system is still the default in most U.S. commercial buildings because it is forgiving, easy to repair, and the chemistry is well understood. Urethane and polyurethane systems cost more per square foot to install but cut labor hours over the life of the floor. For a new facility, the choice is often driven by the flooring manufacturer’s warranty and the cleaning crew’s experience. For an existing facility that has used acrylic for years, switching systems means a full strip down to bare tile before the first urethane coat goes down.
How often a commercial floor really needs waxing
There is no universal answer, and any vendor who quotes a single number without seeing the building is guessing. The right interval depends on foot traffic, cleaning chemistry, finish type, and whether the floor is buffed between full refinishes. A rough starting point is useful, though, and it helps frame the budget conversation.
| Facility type | Daily traffic | Typical full strip cycle | Scrub and recoat between strips |
|---|---|---|---|
| Convenience retail or fast-food dining | Very high | Every 9-12 months | Every 2-3 months |
| Supermarket or big-box store | Very high, with carts and spills | Every 12-18 months | Every 3-4 months |
| Office or medical office | Moderate | Every 18-24 months | Every 4-6 months |
| K-12 school corridor | High, seasonal spikes | Every 12-18 months | Every 3-4 months |
| Hotel lobby or convention center | Moderate to high, with rolling loads | Every 12 months | Monthly burnishing and quarterly recoat |
| Warehouse or back-of-house | Low foot, high forklift | Often skipped; epoxy preferred | Not applicable |
The numbers above are planning assumptions, not guarantees. The real signal is appearance and performance. When high-traffic lanes start looking dull even after burnishing, when scuffs no longer mop up, and when a fingertip leaves a mark in the film, it is time to schedule a scrub and recoat. When the yellowed or discolored patches start to show through the recoat, the floor needs a full strip.
Reading a finish product data sheet
Three numbers on a data sheet matter more than the brand name: solids content, coverage rate, and dry time. Solids content is the percentage of the product that stays on the floor after the water evaporates. A 20 percent solids finish leaves a thinner film per coat than a 25 percent solids finish, so the building may need more coats to reach the same build. Coverage rate is expressed in square feet per gallon, and it changes with each coat because the floor is smoother and absorbs less as the film builds. Dry time includes both “tack-free” and “recoat” windows. The recoat window is the one to respect, because laying a new coat before the previous one has released its water can cause clouding, poor adhesion, and that “orange peel” texture no one likes.
Two other items are worth checking. The first is slip resistance, often listed as a coefficient of friction range under ASTM D2047. The Occupational Safety and Health Administration’s general-duty clause does not mandate a specific number for most facilities, but a finish that drops below the safe range on a wet floor is a real liability. The second is the response to common cleaners. A finish that softens when the janitorial team uses a high-pH degreaser will not last as long as a finish that tolerates neutral cleaners. If the cleaning contract specifies a strong cleaner, the finish specification should match.
Step-by-step: how a professional waxing job runs
The order below reflects the way most contract cleaners handle a full strip and refinish, with notes on the decisions a facility manager should watch for. The goal is to give you enough language to read a work order and ask the right questions.
- Scope the work in person. Walk the floor with the contractor. Note high-traffic lanes, stained areas, baseboard condition, and any flooring transitions. Confirm square footage and decide whether entryways and fitting rooms are in or out of scope.
- Pre-clean the surface. Dry mop and damp mop to remove loose soil. Skipping this step pushes grit into the stripping solution and turns the pad into sandpaper.
- Block the area and post signs. A wet floor is a slip floor. Slips on freshly waxed surfaces are a common source of premises liability claims, so cones, barricades, and signage are not optional.
- Protect adjacent surfaces. Mask or tape off baseboards, thresholds, and carpet edges. Stripper left to dwell on aluminum thresholds will etch them.
- Apply stripper at the recommended dilution. Stronger is not better. Over-strength stripper leaves residue that interferes with the new finish. The product data sheet is the source of truth.
- Allow the proper dwell time. Most strippers need five to ten minutes to soften old finish. Letting the solution dry out before agitation forces the crew to recoat with stripper and re-dwell.
- Agitate with the right pad. A black or high-productivity strip pad is standard for VCT. A blue or green pad is too gentle and may leave finish in the grain. Test a small area if the floor is unusual.
- Remove slurry with a wet vacuum. The old finish and stripper must come up together. Leaving slurry means a hazy new floor within a week.
- Rinse and neutralize. Two clean rinses, often with a neutralizing rinse, bring the floor’s pH back to neutral so the new finish can bond. A pH check on the rinse water is a real QA step, not theater.
- Dry thoroughly. Air movement and ventilation matter more than heat. The floor should be dry to the touch and look chalk-free before the first coat goes down.
- Apply thin, even coats. A standard mop-on applicator with a clean finish mop works for most facilities. Pour lines should be wet enough to spread easily, not so wet that they puddle.
- Respect the recoat window. The data sheet usually calls for recoat within a four to eight hour window for proper chemical bonding. Coats applied outside that window may need a light scrub and re-prep before the next one.
- Build to the planned number of coats. Three to five coats is typical for moderate traffic. Supermarkets and airports often run six or more.
- Burnish between the final coats as specified. Some systems call for a light high-speed burnish after the second-to-last coat to harden the film and improve gloss. Others forbid it because the heat clouds the next coat.
- Do a walk-through before opening the area. Look for missed corners, mop lines, bubbles, and footprints. Catching these in the first hour is far cheaper than catching them in the first week.
A commercial floor waxing job that follows this sequence is uneventful. The trouble starts when one of these steps is compressed because the building has to open in the morning.
Scrub and recoat vs. full strip
A scrub and recoat is the maintenance cycle that sits between full strips. The floor is cleaned with a mildly abrasive pad and a solution designed to remove the top layer of finish without stripping the build underneath. A fresh coat or two of finish is then laid down. The floor looks new again, the cost is roughly a third of a full strip, and the disruption is measured in hours rather than days.
Scrub and recoat is the right answer for most of the year. Full strip is reserved for two situations: the build is too thick and has started yellowing or peeling, or the floor is changing use and needs a fresh start. A common mistake is to scrub and recoat over a damaged film. The new coat bonds to the failing coat, and the whole layer comes up in a sheet. When in doubt, run a fingertip test in a low-traffic corner. If the finish powders off in a clear layer, the build is too old to recoat.
Safety, slip resistance, and liability
Slip-and-fall incidents are among the most expensive claims a property owner can face, and freshly finished floors are a known contributor. Two practical steps reduce that risk without sacrificing appearance. First, ask the contractor for the coefficient of friction value of the proposed finish, measured on a wet surface. Second, schedule the work to allow full cure before the space is open. Most water-based finishes reach operational hardness in twenty-four hours, but full chemical cure can take seventy-two. During that window, the floor is more slippery than it will be a week later, and foot traffic should be restricted.
Documentation matters as much as the floor work. Keep the product data sheet, the dilution log, the number of coats, the dry times, and the walk-through photos. If a claim arises, the documentation is often what separates a defensible position from an expensive settlement.
Working around occupied buildings
Few facilities have the luxury of closing for a full strip and refinish. The For additional context, good news is that the process can be staged, and most contractors have done it many times. Common staging approaches include:
- Sectional closure. The building is divided into zones, and one zone is closed at a time. This is standard in schools and medical offices.
- Overnight work. Retail and grocery stores often schedule full strip and refinish for one or two nights, with burnishing in the last few hours before opening.
- Weekend rolling closure. Office buildings close one wing at a time over a long weekend, with the rest of the building open.
- Soft floor alternatives during cure. Temporary walk-off mats and runner carpet can keep traffic moving while the finish cures, at the cost of some appearance.
Whatever the staging, the contract should spell out hours of work, noise limits, ventilation requirements, and the building’s responsibility for security access. The single most common conflict in occupied waxing work is ventilation: a tight building will trap stripper fumes and slow dry time, and the contractor cannot fix that with a stronger fan.
Equipment that makes the difference
Hand mopping a 20,000 square foot store is a recipe for an uneven floor and a tired crew. The tools below are standard in a well-equipped floor crew and worth asking about when comparing quotes.
- Low-speed rotary buffer (175 RPM). Used for scrubbing, stripping, and polishing. A 17- or 20-inch machine covers most retail and office spaces efficiently.
- High-speed burnisher (1000-2000 RPM). Used between full refinishes to bring back gloss and harden the top layer of the finish.
- Auto scrubber. Combines scrubbing, solution dispensing, and wet vacuum pickup. Cuts labor time on a scrub and recoat by half compared with mop and bucket.
- Wet-and-dry vacuum. Essential for slurry removal during a full strip. A shop vac is not a substitute on a commercial job.
- Applicator systems. Flat microfiber mop heads lay finish more evenly than traditional looped-end mops and reduce wasted product in the bucket.
None of this equipment is exotic. What separates a good contractor from a poor one is usually the condition of the pads and the discipline of changing them on schedule. A black pad used until it is paper-thin is more likely to burn the floor than strip it.
Cost drivers and what a fair quote looks like
Commercial floor waxing costs are quoted per square foot, and the spread is wide. Three drivers explain most of the difference.
- Floor condition. A floor that has been neglected needs more stripper, more pads, and more labor to bring back to a sound substrate. The same square footage can cost twice as much to refinish if it has not been maintained.
- Number of coats. Each coat adds material and dry time. A four-coat job is not twice the cost of a two-coat job, but it is meaningfully more.
- Access and timing. Night and weekend work costs more per hour than daytime work, but it can be cheaper overall because the building does not lose revenue.
For planning purposes, a scrub and recoat in a mid-sized U.S. facility typically runs in the low cents per square foot. A full strip and refinish runs higher, with the exact number driven by the factors above. Treat any quote that is dramatically below the others as a red flag. The labor and product costs are similar across reputable contractors, so a low bid often means fewer coats, skipped steps, or unfamiliar crews.
Common mistakes that shorten finish life
Most premature finish failure traces back to a handful of recurring problems. Knowing them in advance is the easiest way to prevent them on your own floor.
- Cleaning with the wrong product. Strong degreasers and high-pH strippers used as daily cleaners will soften and dull the finish. The daily cleaner should be neutral, and the stripper should stay in the stripper bucket.
- Skipping the rinse after stripping. Stripper residue that is not rinsed properly prevents the new finish from bonding and causes a hazy, peeling film within weeks.
- Laying coats too fast. Recoat windows exist for chemical reasons, not convenience. Respecting them is the difference between a hard film and a soft, cloudy one.
- Building too few coats. Two coats looks fine on day one and wears through in two months in a busy store. The maintenance budget is easier to defend if the build is correct from the start.
- Using the wrong pad. A too-aggressive pad etches the floor. A too-gentle pad leaves old finish behind. The pad on the machine should match the product and the floor.
- Burning the floor with a burnisher. A burnisher run too slowly or held in one spot generates enough heat to scorch the finish and the tile underneath. The operator’s pace matters as much as the machine.
None of these are exotic problems, but each one shows up on real floors every week, and the fix is always more expensive than the prevention would have been.
How a floor maintenance program should be written
Once the floor is in good shape, the program that keeps it that way is mostly a written schedule and a list of approved products. The schedule should spell out the daily, weekly, monthly, quarterly, and annual tasks, and the product list should pair the daily cleaner with the finish on the floor. If the building has multiple floor types, each one needs its own section. The contractor and the in-house team should both have a copy, and the work should be checked against it on a routine walk-through rather than only when the floor looks tired.
Many facility managers also ask the contractor to leave a small repair kit: a quart of the finish used on the floor, a touch-up pad, and a microfiber applicator. Small damage is easier to address the day it happens than the next quarter, when the repair blends into the next maintenance cycle.
When to bring in a specialist
Most general janitorial contractors can handle a routine strip and refinish. There are situations where a specialist is worth the search. Floors with extensive damage, floors that have been coated with multiple unknown products over the years, and floors that have never been fully stripped can all surprise a crew that is used to standard VCT. In those cases, a small test patch in a low-visibility corner is cheaper than a failed full-floor job. The test will tell you how many coats of stripper the floor really needs, whether the substrate is sound, and how the new finish bonds. A contractor who objects to a test patch is a contractor to keep on the list for another project.
For facilities with stone, polished concrete, or wood floors, the conversation is different altogether. Those surfaces use different products and processes, and the terms wax and finish often do not apply. If the building has a mix, the maintenance contract should treat each surface separately.
Environmental and indoor air considerations
Modern water-based finishes are far less odorous and far lower in volatile organic compounds than the solvent waxes common two decades ago. Most carry low- or zero-VOC labels, and the ventilation needed during application is closer to normal building ventilation than to a hazmat response. That said, the building’s HVAC system should be set to push air through the work area rather than recirculate it, and any sensitive occupants should be informed before the job starts. The product data sheet and the safety data sheet are the authoritative sources for ventilation guidance, and the contractor should be willing to provide both on request.
For facilities pursuing green building certifications, the finish specification can support credits related to low-emitting materials. The catch is that low-VOC products still need to be applied correctly. A poorly applied green finish is still a failed floor.
How to evaluate the work after the crew leaves
A post-job walk-through should happen before the contractor’s final invoice. Three quick checks catch most problems:
- Look down the floor from a low angle toward a window or light source. Uneven coats, mop lines, and missed corners show up as visible streaks that are easy to miss from a standing height.
- Run a clean white microfiber across the surface in a high-traffic lane. If it picks up significant finish dust, the floor was likely burnished before the final coat had cured.
- Check the corners and edges by hand. Most finish failures start at the edges because the applicator was lifted early or the stripper was not agitated to the wall. A fingertip test reveals soft or missing film.
If the floor passes these three checks, the work is most likely sound. The next test is time, and a well-applied film should still look good through a full quarter of normal traffic before any burnishing is needed.
Planning the next cycle
Smart facility managers schedule the next strip and refinish before the current one is finished. That sounds wasteful, but it lines up the contractor’s availability, the building’s quietest weeks, and the budget. A school might lock in June for the next two summers. A retailer might lock in the slow weeks after the winter holidays. Either way, the floor never gets to the point where the only option is an emergency job at premium rates.
The final discipline is recordkeeping. Each job should leave a paper trail of products, coats, dates, and photos. Five years of records turns floor maintenance from a recurring headache into a predictable line item, and it gives the next contractor a head start instead of a guessing game.
Where this fits in a broader maintenance program
Floor waxing is one of the most visible maintenance tasks in a commercial building, and it is the one visitors are most likely to notice when it goes wrong. It also shares a maintenance calendar with other scheduled work, from plumbing repair in restrooms to air conditioner repair services in the mechanical room. Treating the floor schedule as part of the same calendar rather than a separate document keeps the work from colliding and keeps the building running smoothly between major cycles.
Frequently asked questions
How long does a commercial floor waxing job take from start to finish?
For a typical 5,000 square foot retail space with three to four coats, plan on two nights of work plus a full cure window before heavy traffic. Larger or more complex jobs can run several days. The contractor’s walk-through estimate is the most accurate number, because the time depends on the floor’s condition, the number of coats, and the building’s ventilation.
Can waxing be done while the building is occupied?
Yes, but it requires sectional closure, clear signage, and good ventilation. Most retail and healthcare facilities use overnight or weekend schedules to keep disruption low. Occupied waxing is more expensive per hour but often cheaper overall because the building does not lose revenue.
How do I know whether the floor needs a full strip or just a scrub and recoat?
If the finish looks dull but is still intact, a scrub and recoat will usually bring it back. If the finish is yellowed, peeling, or has visible buildup at the edges, a full strip is the better answer. A fingertip test in a quiet corner helps: powdering finish is a sign the build is past the point of recoating.
What is the difference between wax and floor finish?
Modern floor finishes are polymer-based coatings, usually acrylic, that are laid in multiple thin coats and buffed to a gloss. Old-fashioned waxes are softer and burnish more easily. Most commercial products on the market today are finishes, even when they are called wax out of habit.
Is waxed flooring slippery when wet?
Any coated floor is more slippery when wet than when dry, and freshly applied finish is the most slippery. A good contractor will post wet floor signs, restrict access until the finish has cured, and choose a finish with a tested wet coefficient of friction. Documentation of the slip rating is a reasonable thing to ask for before the job starts.
How many coats of finish are right for a busy store?
Most facilities build four to six coats in high-traffic areas and three to four in offices and back rooms. The product data sheet’s coverage rate, the building’s traffic pattern, and the planned maintenance cycle all influence the number. Fewer coats save money up front but shorten the time to the next strip.
What cleaners should be used on a waxed floor?
A neutral pH cleaner is the safe default for daily and weekly cleaning. High-pH degreasers and ammonia-based products will soften and dull the finish over time. The cleaner and the finish should come from compatible product lines, and the janitorial team should know which products are approved.
How do I tell if a contractor’s quote is reasonable?
Compare line by line: square footage, prep work, number of coats, product names, dry times, and warranty. A dramatically low bid usually means fewer coats, a thinner product, or a less experienced crew. A good quote is detailed enough that two contractors quoting the same scope will arrive at similar numbers.
Can old wax be restored instead of stripped?
Sometimes. If the build is intact and the damage is limited to scuffs and minor discoloration, a deep scrub and several fresh coats can restore appearance. If the film is yellowed, peeling, or contaminated with the wrong product, no amount of recoating will fix it. A test patch is the cheapest way to find out.
How does commercial floor waxing interact with polished concrete or stone?
It generally does not. Polished concrete, terrazzo, and natural stone are maintained by different processes and products, and wax can actually harm their finish. If the building has a mix of resilient flooring and hard surfaces, the maintenance contract should treat each one separately and use compatible products on each.
Leave a Reply