
Trenchless sewer line replacement: what homeowners should know
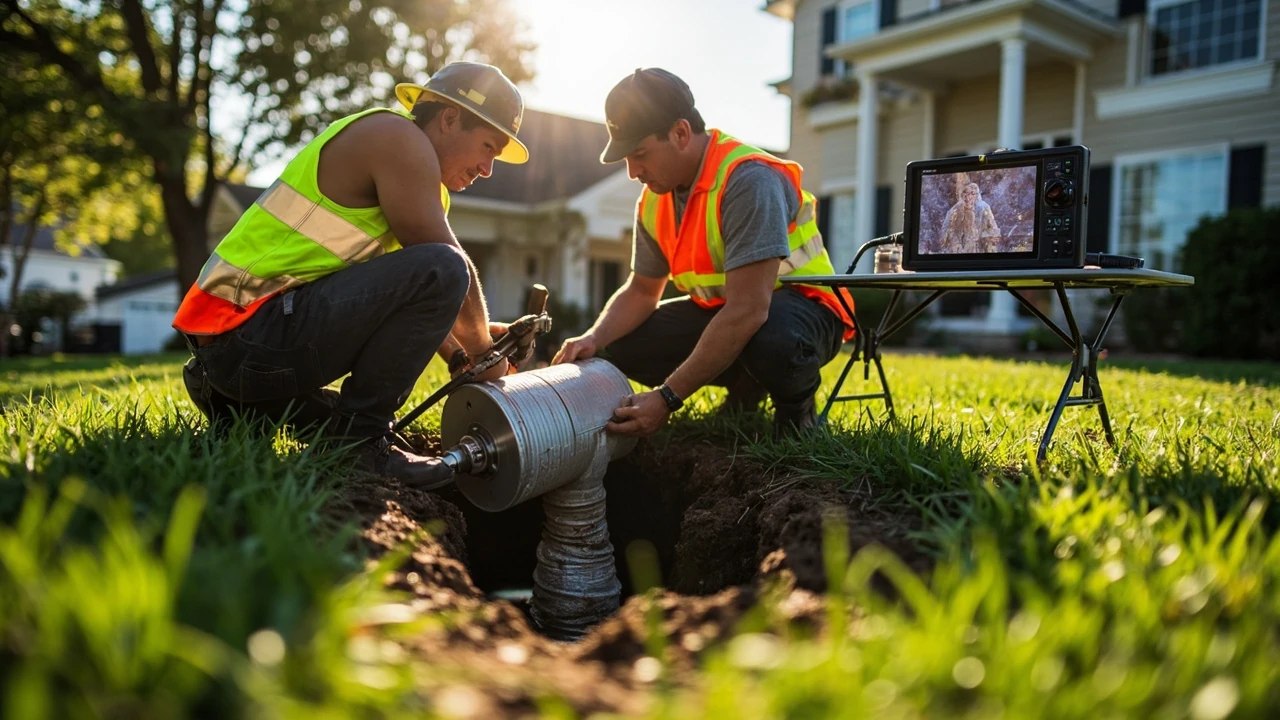
When the main sewer line under a front yard finally fails, the old picture is hard to forget: a backhoe carving a trench through the lawn, a driveway jackhammered into pieces, and a week of restoration work after the plumber leaves. Trenchless sewer line replacement is the modern alternative to that scene. Instead of excavating the entire run of pipe, a crew restores or renews the line from one or two small access points, usually finishing the job in a single day for a typical residential run.
The catch is that trenchless methods are not magic. They depend on the existing pipe still holding a roughly round shape, on the right soil and depth conditions, and on a contractor who knows how to run a sewer camera, a liner inversion drum, or a pipe-bursting head. This guide walks through how the two main trenchless methods actually work, when they make sense, what they typically cost in the U.S. market, and the situations where traditional excavation is still the smarter call.
How trenchless sewer line replacement actually works
Trenchless replacement is a family of techniques, not a single product. The two methods that show up on most residential bids are pipe lining (also called cured-in-place pipe, or CIPP) and pipe bursting. Both start with the same diagnostic step: a CCTV sewer camera is pushed through the line from a cleanout so the contractor can see the actual damage, measure the depth, and confirm the pipe material and diameter.
With pipe lining, the contractor saturates a flexible felt or fiberglass sleeve with epoxy resin, then inverts it into the existing pipe using water or air pressure. The sleeve presses against the inside walls of the old pipe and is cured in place with hot water, steam, or ambient temperature, depending on the resin system. The result is a new pipe within the old pipe, with a slightly smaller inside diameter but a smooth, jointless interior that resists roots and corrosion.
With pipe bursting, the crew pulls a cone-shaped bursting head through the old pipe while a new high-density polyethylene (HDPE) pipe is towed in behind it. The bursting head fractures the existing pipe outward into the surrounding soil, and the new HDPE line takes its place. Unlike lining, this method actually replaces the pipe material, so the final inside diameter is the same as, or slightly larger than, the original.
The diagnostic step that decides which method is used
Before any trenchless work begins, a proper contractor will not quote a price from a phone call. They will run a camera, record the line, mark the depth and location of the problem with a locator, and tell the homeowner what they actually saw. That single video is the most important document in the project, because the choice between lining, bursting, and full excavation comes down to what the camera shows.
Pipe lining versus pipe bursting at a glance
Homeowners often receive two or three different recommendations from different contractors and have no easy way to compare them. The table below summarizes the practical differences between the two leading trenchless methods and traditional open-cut replacement, so a reader can match the technique to the situation they actually have.
| Factor | Pipe lining (CIPP) | Pipe bursting | Open-cut replacement |
|---|---|---|---|
| Best for | Cracks, root intrusion, minor offsets in a structurally round pipe | Severely damaged, ovalized, or undersized pipes that still allow a pull-through | Collapsed pipes, severe bellies, or pipes under structural slabs |
| Excavation needed | One small access pit, often 2 to 3 feet square | Two small pits at the start and end of the run | A continuous trench the full length of the line |
| New pipe material | Epoxy-impregnated felt or fiberglass cured inside the old pipe | Seamless HDPE | PVC, vitrified clay, or cast iron, depending on code |
| Effect on inside diameter | Slightly reduced (typically 1/4 to 1/2 inch) | Equal to or larger than the original | Matches the new pipe’s nominal size |
| Typical install time (residential) | One day | One to two days | Three to five days, plus restoration |
| Common limitations | Cannot bridge a fully collapsed section or a severe belly | Needs a straight, pullable run; not ideal near other utilities | Disruptive to landscaping, hardscape, and driveways |
The inside-diameter reduction from lining is a real engineering detail, not a sales objection. A 4-inch host pipe lined with a felt sleeve ends up with roughly a 3.5-inch finished interior, which is still more than adequate for a residential sewer serving a normal fixture count. It is only a concern on long commercial runs or lines that already had marginal flow.
When trenchless sewer line replacement is the right call
Trenchless methods fit a wide range of common residential problems, especially in older neighborhoods with mature trees, where roots have worked their way into the joints of a clay or cast-iron main. The most common scenarios where a trenchless approach makes sense include:
- Root intrusion through the joints of an otherwise intact clay or concrete pipe.
- Long horizontal or vertical cracks along the barrel of the pipe, with the original round shape still preserved.
- Minor offsets at the joints, where one section has shifted slightly but not fully separated.
- Corrosion or scaling inside a cast-iron line, with the outside still intact enough to act as a host.
- Replacement needed under a driveway, patio, mature tree, or finished basement floor, where excavation would be disproportionately expensive.
For homes built before the mid-1970s, clay tile sewer laterals were standard. Those pipes were strong in compression but relied on mortared joints, which roots and ground movement slowly defeat. A liner or a new HDPE run inserted through the same path avoids excavating the same yard the original trench cut decades earlier.
When traditional excavation is still the better answer
Trenchless is not a universal upgrade. There are well-defined situations where a contractor who pushes a trenchless solution is doing the homeowner a disservice. The clearest cases for open-cut replacement are:
- A pipe that has fully collapsed, with the camera unable to pass the break at all.
- A severe belly, also called a sag, where the pipe holds standing water across a long section. Lining a saggy pipe just creates a new saggy pipe.
- A line with a major offset, where one section has dropped several inches relative to the next and solids will catch on the lip.
- Structural defects in the first few feet under the foundation or under a load-bearing slab, where access pits are not realistic.
- Pipes that are too shallow, too close to other utilities, or in soil with large boulders that would deflect a bursting head.
A reputable contractor will tell a homeowner in plain language that the camera shows a collapse, a belly, or a structural offset, and will explain why lining or bursting will not solve it. If a bid arrives without a recorded camera inspection, that bid is incomplete, regardless of how attractive the price looks.
What the process looks like from the homeowner’s side
Even on a smooth trenchless job, a homeowner can expect a predictable sequence of steps. Knowing the order helps in comparing bids and in planning around water usage during the work.
- Initial diagnosis with a sewer camera, including a recorded video and a sketch of the line’s depth and location.
- Locating the line with a pipe locator, marking the path with spray paint so the crew knows where to dig the access pit or pits.
- Hydro jetting or mechanical cleaning to clear roots, scale, and debris so the host pipe is ready for the liner or pull-in.
- Excavation of one or two small access pits, usually 2 to 4 feet deep, sized to the equipment being used.
- Installation of the liner or the bursting head and new HDPE pipe, depending on the chosen method.
- Curing (for lining) or connection (for bursting), then a final camera inspection to confirm the finished line.
- Backfilling the access pits, restoring any disturbed landscaping, and hauling away spoil material.
Water service to the home is typically shut off for part of the day. Most contractors ask homeowners to minimize water use during the install window and to avoid running dishwashers, washing machines, and long showers until the line is back in service.
Typical cost ranges in the U.S. residential market
National averages shift with labor costs, region, and pipe depth, so any number should be treated as a planning figure rather than a quote. The table below reflects widely reported ranges for residential main sewer line replacement on runs of roughly 30 to 100 feet, including permits and restoration of the access pits. Local prices will vary, and a written estimate from a licensed local contractor is the only reliable number.
| Replacement method | Typical residential cost range (USD) | Main cost drivers |
|---|---|---|
| Pipe lining (CIPP) | About $80 to $250 per linear foot, often $4,000 to $13,000 total | Length, diameter, number of reinstatements, resin system, access |
| Pipe bursting | About $60 to $200 per linear foot, often $5,000 to $15,000 total | Length, depth, soil conditions, utility congestion, restoration |
| Open-cut replacement | About $50 to $250 per linear foot, often $5,000 to $25,000 total | Depth, hardscape removal and replacement, permits, landscaping |
Open-cut can sometimes be cheaper on a short, shallow run with no hardscape in the way, especially if a contractor already has an excavator on site for another job. Trenchless methods tend to win on total project cost once the line runs under a driveway, a mature tree, a porch, or a finished basement, because the savings on restoration often outweigh the higher unit price of the install.
How to vet a trenchless contractor
The trenchless field attracts a mix of specialists and general plumbers who subcontract the liner or bursting step. Either model can produce good work, but the homeowner benefits from asking a few specific questions before signing a contract.
- Will the company perform and record its own camera inspection, or is the inspection subcontracted?
- Is the lining or bursting crew in-house, or is the actual install outsourced to a third party?
- What is the warranty on the installed liner or HDPE pipe, in years, and is the warranty transferable to a new owner?
- Will the final camera video be provided as part of the project record?
- Is the company licensed, bonded, and insured for sewer work in the local jurisdiction, and will it pull the permit?
- What is included in the written estimate: pit excavation, restoration, permit fees, and surface patching?
For broader context on the practical pros and cons of going trenchless, a useful starting point is this overview of the pros and cons of trenchless sewer line repair, which walks through the same trade-offs most homeowners run into on a typical bid.
For plumbing repairs in general, including the warning signs that point to a main line problem in the first place, our plumbing repair guide lays out the early symptoms that catch a problem before it becomes an emergency.
Common warning signs that a main line is failing
Most homeowners do not call a sewer contractor until something dramatic happens, but the main line usually gives a long runway of smaller clues. A pattern of any of the following across multiple fixtures is a strong reason to schedule a camera inspection rather than wait for a full backup.
- Multiple drains slowing at the same time, especially on the lowest level of the home.
- Gurgling in a tub or shower when a toilet is flushed.
- Water backing up into a floor drain, a basement shower, or a washing machine standpipe.
- Sewer odor in the yard, especially along the path between the house and the street or septic tank.
- Lush green strips or soggy patches in the lawn above the line, even in dry weather.
- Repeated need for rooter or auger service more than once a year.
These signs do not prove the line is failing, but they justify the cost of a camera inspection. That single piece of evidence is what makes a trenchless-versus-excavation decision possible at all, because without it, every contractor is guessing from a different starting point.
Permits, codes, and what the inspector will look for
Most U.S. jurisdictions treat a main sewer line replacement as permitted work, even when no excavation touches the street. A permit is typically pulled by the licensed contractor, and a final inspection is scheduled once the new line is in place and the pits are backfilled. The inspector will usually want to see the following before signing off:
- The final camera video showing a clean, properly sloped line with no standing water in the barrel.
- Correct slope of the new line, generally a fall of about 1/4 inch per foot for 4-inch residential laterals, though local code may differ.
- Proper connections at the city tap or septic tank, with code-approved fittings and cleanouts at required spacing.
- Documentation of the materials used, including the resin type for lining or the SDR rating for HDPE.
For pipe lining specifically, the installer should also document the cure time and temperature, since the resin’s structural rating depends on a complete cure. Skipping that step is one of the most common shortcuts in low-cost bids and is one of the reasons a written warranty with real terms matters.
How long a trenchless line is expected to last
Manufacturers of CIPP liners and HDPE pipe both publish design lives in the 50-year range when the materials are installed to spec. Real-world performance depends heavily on the conditions around the pipe: soil movement, groundwater, and the load above the line. A liner installed in a stable, well-drained soil with proper cure time is likely to outlast a 30-year mortgage. A liner installed in a soggy yard with poor slope and a partial cure is a different story.
The two practical takeaways for a homeowner are that the material itself is not the weak link, and that the install quality is. Asking a contractor how they verify a complete cure, how they handle transitions at the city connection, and what their warranty excludes in terms of ground movement is a better predictor of lifespan than any advertised design life.
What trenchless sewer line replacement cannot fix
It is worth being direct about the limits of trenchless work, because marketing language can leave a homeowner with the wrong mental model. Trenchless methods do not:
- Reroute a line that runs in the wrong place. They follow the existing path of the old pipe.
- Fix a structural problem in the building, such as a settled foundation or a failed slab.
- Eliminate a belly or sag caused by soil settlement; the new pipe will follow the same low spot.
- Repair a broken connection at the city main, which is usually the city’s responsibility anyway.
- Substitute for a proper septic system on a property that is not actually tied to a sewer main.
For a property with a structural belly under the front lawn, the realistic options are usually a full excavation to regrade the line or, in some cases, an engineered lift with flowable fill. A liner installed in that situation will simply mirror the belly and continue to collect solids.
Insurance, financing, and the role of a warranty
Standard homeowners insurance usually does not cover a failed sewer lateral, because it is treated as a maintenance item rather than a sudden peril. Some policies offer an optional sewer and water line endorsement, and some municipalities run group programs that cover part of the replacement cost. Reading the declarations page and calling the insurer before signing a contract is worth the time.
On the financing side, many trenchless contractors offer short-term same-as-cash or low-interest plans, and a few states and cities have grant or low-interest loan programs for sewer lateral replacement on older homes. A quick check with the local public works department can sometimes surface a program that pays for part of the work.
The warranty document itself deserves a careful read. A transferable 10-year or longer warranty on the installed material, combined with a one- to two-year warranty on the workmanship around the pits and connections, is common. A warranty that excludes ground movement, freezing, or the city tap is also common; that is not automatically a red flag, but it should be understood before the project starts.
Frequently asked questions
How long does a trenchless sewer line replacement take?
For a typical residential run of 30 to 100 feet, most trenchless jobs are completed in a single day, with the camera inspection, cleaning, lining or bursting, and final inspection often all on the same workday. More complex jobs, or those with multiple connection reinstatements, can stretch into a second day.
Is trenchless sewer line replacement as strong as a new PVC line?
A properly cured CIPP liner and a new HDPE pipe from a pipe-bursting job are both rated for decades of service in residential conditions. The structural strength comes from the resin system or the HDPE wall, not from the old host pipe, which acts mainly as a channel for installation. Open-cut replacement with PVC is also a fully proven method, and the choice between them usually comes down to access and cost, not strength.
Can a trenchless line be installed if the old pipe has roots?
Roots are one of the most common reasons homeowners end up considering replacement in the first place. Before any liner or bursting head goes in, the line is hydro-jetted or mechanically cleaned to remove roots and debris. The new liner or HDPE pipe has no joints for roots to exploit, so root intrusion becomes a thing of the past once the line is renewed.
Will my yard be torn up during trenchless work?
Trenchless methods are designed to limit excavation to one or two small access pits, typically 2 to 4 feet square. The rest of the lawn, the driveway, and the landscaping stay in place. Some surface disturbance around the pits is normal, and most contractors restore the soil and sod at the end of the job.
Do I need a permit for trenchless sewer line replacement?
Most U.S. jurisdictions require a permit for any main sewer line replacement, including trenchless work. The licensed contractor usually pulls the permit, schedules the final inspection, and provides the recorded camera video to the inspector. Homeowners should confirm that the permit is in place before work starts.
What is the difference between trenchless repair and trenchless replacement?
Trenchless repair is a broader term that includes spot repairs, sectional liners, and other fixes that address a short section of damaged pipe. Trenchless replacement refers to renewing the full length of the line, either by lining the entire run or by bursting and replacing it with HDPE. The choice depends on the camera findings and on the length and condition of the host pipe.
How do I know if my pipe is a candidate for trenchless work?
The only reliable way to know is a recorded camera inspection by a contractor who offers trenchless methods. The video shows whether the pipe is round, whether the damage is a crack, a joint offset, a partial collapse, or a belly, and whether the line is a candidate for lining, bursting, or requires open-cut replacement.
Will trenchless work affect my water service during the day?
Yes, expect the water to be shut off for several hours while the new line is being installed and cured. Most contractors ask homeowners to avoid running dishwashers, washing machines, and long showers during the install window and to plan around a short outage, usually well under a full day.
What kind of warranty should I expect on a trenchless line?
Warranty terms vary by contractor and by the material installed. A common structure is a 10-year or longer warranty on the liner or HDPE pipe itself, often transferable to a new owner, combined with a one- to two-year warranty on the workmanship around the pits and connections. Read the exclusions carefully, especially around ground movement and the city tap.
Is trenchless sewer line replacement worth it on an older home?
For many older homes, especially those with mature trees, finished basements, or driveways and patios that would be expensive to restore, trenchless methods are often the most cost-effective way to renew a failing lateral. The deciding factors are the camera findings, the depth and length of the run, and the surface features above the line, all of which a qualified local contractor can evaluate on site.
Leave a Reply